
Last updated October 31, 2026
Attic Insulation Maintenance Checklist for Stanton Homeowners
Most Stanton homeowners assume attic insulation either works or it doesn’t – a binary condition you check once when you buy the house and then forget about. That assumption is expensive. In our experience, a 15-year-old blown-in attic in Stanton can look perfectly intact from the access hatch and still perform at half its original R-value, because the damage happens at the bottom of the batt, not the top. Compression, rodent activity, and moisture work from below, invisible until you look for them. This checklist, which complements our Attic Insulation Troubleshooting: Common Problems and How to Fix Them guide, walks you through a sequence of checks built around how insulation actually degrades in Stanton’s climate – and how to catch it early.
Quick Answer
Attic Insulation services and maintenance in Stanton means checking your attic twice a year – ideally in spring before cooling season and in late fall after Santa Ana wind events – for compression, rodent intrusion, moisture stains, and blocked ventilation. The most telling check involves measuring the effective depth of your insulation against the original installed depth: if blown-in cellulose or fiberglass has settled by more than 20 percent, it’s under-performing and should be topped up or replaced. Document everything with dated photos; that annual record becomes evidence for insurance claims and home sale disclosures later.
Table of Contents
- Why Stanton Insulation Degrades the Way It Does
- Measuring Effective Depth vs. Original Depth – The Compression Check
- Reading the Rodent Signs: Roof Rats, Squirrels, and What They Leave Behind
- Ventilation Blockage: The Quiet Accelerator of Insulation Failure
- Seasonal Timing: When to Run Which Checks
- Moisture, Staining, and Mold – The Hidden Bottom-of-Batt Problem
- Photographing Your Attic: The Documentation Habit That Pays Off
- Common Mistakes to Avoid
- When to Call a Professional
- Frequently Asked Questions
- The Bottom Line
Why Stanton Insulation Degrades the Way It Does
Stanton sits in a climate that stresses insulation differently than most of the country assumes. It’s not extreme cold that attacks your attic – it’s heat, dry air, and wind. Summer attic temperatures regularly exceed 140 degrees in Stanton, baking fiberglass and cellulose through hundreds of thermal cycles each year. Each cycle causes slight material fatigue, especially in blown-in products that settle under their own weight over time. Meanwhile, Santa Ana winds in fall blow dust, pollen, and fine debris through attic vents at sustained speeds high enough to coat insulation surfaces with particulate film, which gradually reduces breathability and contributes to micro-compression at the surface layer.
The second major factor is Stanton’s wildlife pressure. Roof rats are an ongoing presence in Orange County residential neighborhoods, and squirrels are common wherever mature trees meet rooflines. Both species tunnel through loose-fill insulation to create nesting cavities. A single rat tunnel can displace enough insulation to create a thermal void of several square feet, letting heat pour through in summer and conditioned air escape in winter. The damage is cumulative and almost always hidden from an access-hatch view. This is why maintenance here isn’t a casual glance – it’s a structured inspection sequence.
Finally, Stanton homes built before modern energy codes often have marginal attic ventilation to begin with. Older gable-vent-only attics lack the continuous ridge-and-soffit airflow that newer builds have. When those vents get blocked by dust, insulation blown too close to the eave, or nesting material, you get heat and moisture buildup that degrades insulation from both above and below. Understanding this three-way interaction – heat, wildlife, and ventilation – forms the foundation of every check below.
Measuring Effective Depth vs. Original Depth – The Compression Check
This check answers the question every Stanton homeowner eventually asks: is my insulation still doing its job? The method is simple, requires no special tools, and gives you a number you can act on. Loose-fill insulation, whether fiberglass or cellulose, has a rated R-value per inch at a specified density. When material compresses – from settling, from being walked on during past service calls, from rodent traffic, from moisture weight – that R-value per inch degrades unevenly because density changes alter the air pockets that do the insulating.
Here’s the step-by-step compression check we recommend:
- Get your baseline. Look for the insulation card or a faded stamp on a rafter that notes the original R-value. Common Stanton installs are R-30, R-38, or R-49 attic insulation. If there’s no record, assume the original depth matched code at the time of construction or last retrofit.
- Measure current depth in multiple spots. Use a yardstick or wooden dowel marked in inches. Push it straight down through the insulation until it touches the drywall or plaster below. Measure in at least five locations: the four corners of the attic and the center. Depth will vary naturally, but if the lowest reading is more than 20 percent below the highest reading, you have uneven settling.
- Compare effective depth to original depth. For example, loose-fill fiberglass at R-38 originally measures about 12 to 14 inches deep depending on the product. If you measure 8 inches in most locations, you’ve lost roughly 30 percent of your thermal barrier. Blown-in cellulose compresses more predictably than fiberglass; a 20 percent loss in cellulose depth is common after 10 to 15 years and should be corrected.
- Mark your findings on paper. Write the date, the five measurements, and any visual notes. This becomes the baseline for next year’s comparison. Without it, you’re guessing whether the insulation is continuing to degrade.
In newer Stanton townhome developments where attics are shallow to begin with, compression from a single service visit – an HVAC tech, an electrician, a cable installer – can knock insulation performance down significantly just from body weight. If you’ve had anyone work in the attic in the past year, run this check even if the insulation is less than five years old.
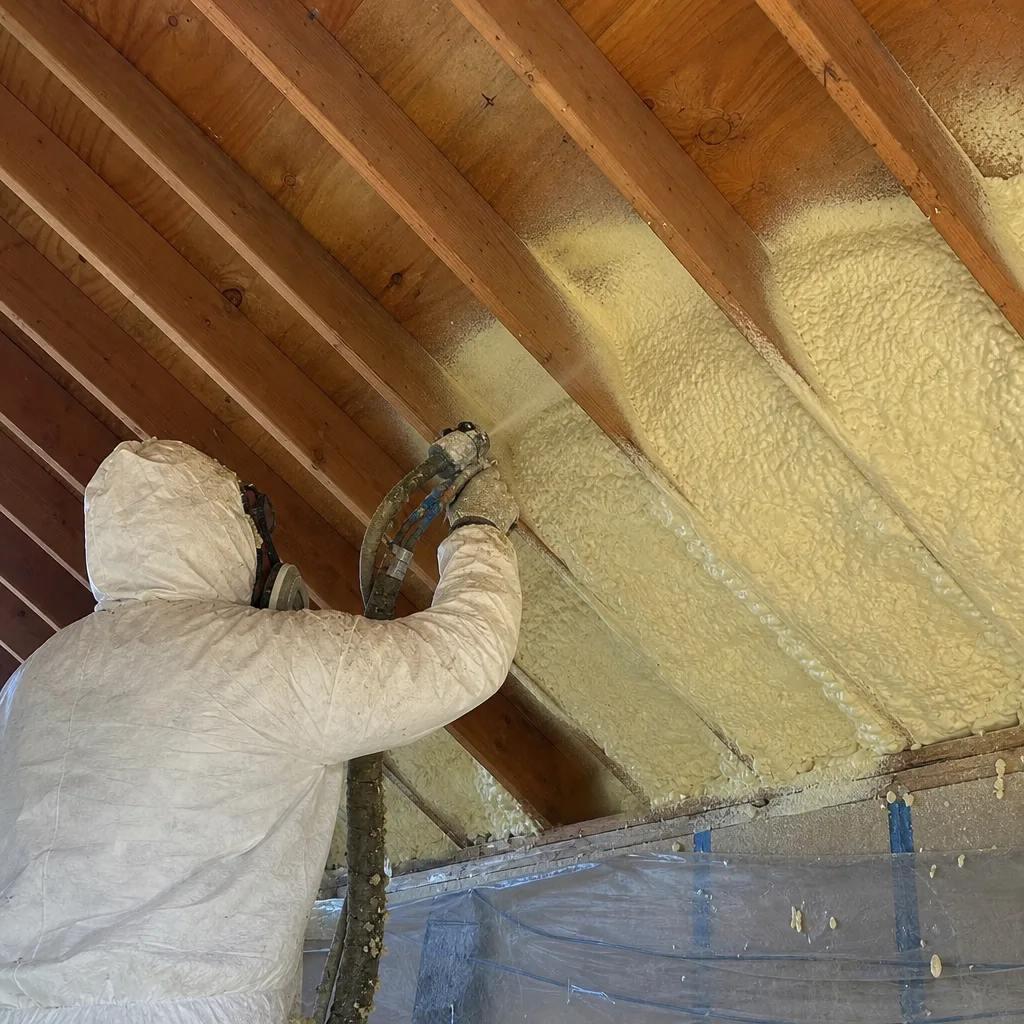
If your measurements indicate you’ve lost more than 20 percent of depth, the practical fix in most cases is topping up with fresh material – often blown-in insulation in Stanton – matched to whatever product is already there. In our experience, mixing material types without guidance causes uneven density and inconsistent R-value, so we recommend matching the existing product unless the goal is a full removal and replacement with something like spray foam insulation in Stanton, which resists future settling entirely.
Reading the Rodent Signs: Roof Rats, Squirrels, and What They Leave Behind
Stanton’s mature tree canopy – especially in neighborhoods along the western edge near the county parks and along older lot lines with eucalyptus and palm trees – creates ideal travel routes for roof rats and squirrels. These rodents don’t just live in attics; they rearrange them. A roof rat will carve runways through loose-fill insulation, pushing material aside to create clear paths from entry points to nesting sites. Squirrels do the same but favor corners and especially the junction where roof planes meet walls, carving out insulated hollows for winter dens.
What you’re looking for, and what it means:
- Tunnels and trenches. Irregular channels in the insulation surface that expose the drywall below. Each exposed channel is a direct thermal leak. A rat runway 2 inches wide and 8 feet long removes insulation coverage over roughly 16 square feet of ceiling.
- Nest cavities. Bowl-shaped depressions packed with shredded material, leaves, or attic debris. Rodents shred fiberglass and cellulose fibers to make bedding, which further damages the surrounding material and creates concentrated compression points.
- Droppings. Roof rat droppings are black, spindle-shaped, about half an inch long, often found in clusters along runways. Squirrel droppings are larger, lighter brown, and more scattered. The presence of either confirms active animal traffic, not just old damage.
- Urine staining and odor. Rodent urine saturates insulation in specific areas, creating ammonia smell and permanent material degradation. Saturated insulation loses its loft and cannot be remediated; it must be removed and replaced.
- Grease smudges. Dark waxy rub marks along rafters, trusses, or entry points near eaves. Rodents leave body oils as they squeeze through openings. These smudges show you where they’re coming in.
- Chewed vent screens or soffit gaps. Rats can chew through plastic vent screens and aluminum soffit panels. Check every vent opening for gnaw marks or pushed-in screening.
Once rodent intrusion is confirmed, the sequence is straightforward: seal entry points first, remove contaminated insulation second, then restore the thermal barrier. In our experience, skipping the sealing step guarantees a repeat visit within a year. Rodents in Stanton attics are persistent; they’ll find the same entry point or another within feet of the original.
For homeowners replacing rodent-damaged insulation, attic insulation in Stanton done correctly involves both material replacement and often upgrading the product type. Rockwool mineral wool carries natural rodent resistance due to its density and composition – rodents dislike tunneling through it the way they tunnel through loose fill – which makes it a practical consideration for any Stanton home with a history of attic intrusions.
Ventilation Blockage: The Quiet Accelerator of Insulation Failure
A blocked soffit vent degrades insulation faster than age alone. Soffit vents are the intake side of the attic ventilation equation; air enters there, flows up along the roof deck, and exits through ridge vents or upper gable vents. When soffit vents are blocked, airflow stalls, attic temperatures climb, moisture accumulates, and insulation absorbs the consequences. In Stanton’s summer, a blocked soffit can push attic temperatures 30 to 40 degrees higher than a properly vented attic, which accelerates material degradation and drives heat downward through the ceiling into the living space.
Here’s the ventilation check sequence as part of your insulation maintenance:
- Inspect every soffit vent from below. Walk the exterior perimeter of the house and look up. Soffit vents are the perforated panels or round plugs underneath the roof overhang. Check for dust crust, spider web buildup, paint overspray from a past exterior paint job, or visible debris.
- Check from inside the attic. Look along the eaves where the roof meets the exterior walls. You should see daylight through the vent openings. If the insulation material has been pushed or blown against the soffit area, it’s blocking air intake. This is common in Stanton homes where blown-in insulation was installed without baffles installed along the eaves first.
- Confirm the ridge or upper vent is clear. Ridge vent opening runs along the roof peak; check for bird nesting material or debris that could choke the outlet side. Static roof vents and gable vents get clogged with dust and pollen accumulation over a single Santa Ana season.
- Test airflow on a hot afternoon. Place your hand near the soffit vent inside the attic. You should feel warm air moving upward. If the air is still and heavy, ventilation is compromised.
Insulation and ventilation are connected systems, not separate concerns. An attic with excellent insulation and dead airflow will still produce uneven ceiling temperatures, moisture spotting on the underside of the roof deck, and shortened insulation life. Correcting ventilation problems often means adding rafter baffles, clearing existing vents, and reapportioning where insulation sits along the eave line. For Stanton attics with shallow eaves or unusual framing, we typically evaluate the ventilation profile before recommending any insulation addition, because adding material without fixing airflow just hides the problem temporarily. See our Choosing the Right Insulation Brand: A Buyer’s Guide for Stanton for material selection guidance.
Seasonal Timing: When to Run Which Checks
Stanton’s climate isn’t four seasons – it’s really two seasons with two transition events. The insulation maintenance calendar should follow those transitions. The wrong check at the wrong time wastes effort; the right check at the right time catches damage early.
Late spring (April – May), before the summer cooling season:
- Run the full compression measurement. You want your attic insulation performing at maximum possible R-value before the air conditioner starts working against 140-degree attic heat daily.
- Check soffit and ridge ventilation. Summer heat stress does the most damage when airflow is restricted.
- Inspect for rodent sign from winter nesting. Rats and squirrels that nested over winter have left visible evidence by spring – tunnels, droppings, and matting are apparent now.
- Look for moisture stains on the roof deck above the insulation. Winter rains in Stanton leave measurable marks if a roof leak started during the wet season.
- Confirm the attic access panel or hatch seals fully. Gaps around the hatch let conditioned air escape into the attic all summer.
Late fall (October – November), after the first Santa Ana wind events:
- Re-measure depth. If the wind season blew fine dust into the attic, you’ll see it as a gritty surface layer on the insulation. Note it, but don’t replace material for dust alone.
- Recheck ventilation. Santa Ana winds drive dust and debris into soffit vents at sustained high speeds. The vents that were clear in spring can be partially clogged by November.
- Inspect for new animal entry. Fall is when rodents seek winter shelter. The beginning signs – gnawed screens, new tunnels – appear before the nesting damage accumulates.
- Look for insulation displacement. Strong wind events can create slight negative pressure in the attic, shifting loose-fill near ridge openings and creating thin spots.
- Write down your measurements in the same format as spring. Compare the two seasonal readings. If depth has dropped by more than an inch between spring and fall, investigate why – insulation doesn’t settle that quickly on its own.
Running checks on this schedule means your insulation never goes more than six months without a documented inspection. For most Stanton homeowners, that’s enough to catch any problem before the repair bill becomes a replacement bill.
Moisture, Staining, and Mold – The Hidden Bottom-of-Batt Problem
The most expensive attic insulation problem in Stanton is usually the one no one sees from the access hatch: moisture collected at the bottom of the insulation layer, where material touches the ceiling drywall. It happens gradually. A small roof leak, a bathroom exhaust fan vented into the attic instead of through the roof, a duct that sweats in summer heat – each adds trace moisture that condenses on the coolest surface, which is usually the drywall below the insulation. Over time, the bottom inch of blown-in fiberglass or cellulose becomes damp, compressed, and eventually contaminated.
Moisture damage in attic insulation presents in specific ways:
- Darker, flattened insulation at the bottom layer. Pull back a small section of material near a suspected area. If the lowest layer looks darker, clumped, or has visible water staining, it’s been wet.
- Drywall staining or visible discoloration on the ceiling below. This confirms that moisture has already traveled through the insulation and affected the living-space surface.
- White, gray, or black mold growth on the insulation surface or roof deck. Mold does not grow on clean, dry fiberglass, but it will absolutely grow on the dust, rodent droppings, and organic particles that collect on insulation surfaces in real attics.
- A persistent musty odor in rooms near the attic access. That smell moves downward through recessed light fixtures, attic hatches, and wall top plates.
- Rust on visible metal fasteners or nail points protruding through the roof deck. Condensation in the attic creates rust trails on the nails that appear from the interior.
Wet insulation cannot be dried out and re-used. Once fiberglass or cellulose has been saturated, the fibers collapse and the material loses its thermal properties permanently. The correct response is removal of the affected section, investigation and repair of the moisture source, and replacement of the insulation – possibly with a product better suited to the specific conditions, such as closed-cell spray foam, which acts as both an air barrier and a vapor retarder in humid attic environments. The spray foam insulation approach in Stanton often makes sense after moisture incidents because it eliminates the air pathways that carry moisture into the attic in the first place.
Photographing Your Attic: The Documentation Habit That Pays Off
One of the highest-leverage habits a Stanton homeowner can build is the annual attic photo record. It takes ten minutes, requires no training, and produces evidence with real financial value in three specific scenarios: insurance claims, contractor disputes, and home sales.
Here’s the method: twice a year, when you run your scheduled checks, take photos from the same positions. Stand at the access hatch and shoot the four main quadrants of the attic. Then shoot the areas directly above the kitchen, bathrooms, and any room where you’ve noticed temperature differences. Use your phone’s flash consistently on or off. Save the files with a date, or put them in a folder named with the year and season. The key is consistency of angle and coverage, so year-over-year changes become obvious when you scroll through them.
What this record does for you:
- Insurance claims. If a roof leak damages your insulation and ceiling, your insurer will ask when the leak started and what pre-existing damage existed. Dated photos showing dry, intact insulation six months earlier answer that question with evidence, not memory. This can materially affect claim resolution.
- Contractor disputes. If you had an attic service – insulation, pest control, HVAC work – and later discover displaced or damaged insulation, your before photo makes it possible to identify what changed and when.
- Home sale disclosure. California sellers must disclose known material conditions. A photo record showing consistent insulation condition over several years supports your disclosure claim and can protect you against post-sale claims of concealment.
- Maintenance planning. Comparing photos season to season reveals slow changes – gradual settling, accumulating dust at vents, the first signs of rodent activity – that would be invisible without a reference point.
We’ve worked with Stanton homeowners whose annual photo log made the difference between an insurance payout and a denied claim, simply because they could prove the insulation was intact on a specific prior date. The habit costs nothing and compounds value every year.
Common Mistakes to Avoid
- Only checking from the access hatch. The hatch view shows the top surface of the insulation; the problems live below that. You must climb into the attic and inspect at material level to see compression, moisture, and rodent sign.
- Adding insulation over rodent-damaged or wet material. Fresh insulation does not neutralize contaminated old material. Trapping moisture and droppings under new blown-in fiberglass just seals the problem in and gives it a warmer environment to keep growing.
- Skipping the ventilation check because the insulation looks fine. A blocked soffit vent in Stanton will cook your attic for one full summer, and the damage appears as premature settling and material degradation 12 to 24 months later. By the time the insulation looks bad, the root cause is older.
- Assuming all insulation types age the same way. Blown-in fiberglass settles. Cellulose settles and is more moisture-sensitive. Spray foam doesn’t settle but can shrink slightly if improperly mixed. Mineral wool resists compression and rodents. Knowing what you have changes what your maintenance looks like.
- Measuring depth in one spot and calling it good. Insulation depth in a real Stanton attic varies by 30 to 50 percent across the floor plan because settling follows rafter patterns, traffic paths, and air currents. A single measurement gives you false confidence.
- Waiting until summer to discover your attic problem. The worst time to discover you need attic insulation work in Stanton is mid-July, when your air conditioner is running hard and the attic is 140 degrees. Spring checks catch problems before they become summer emergencies.
- Using a contractor that stocks only one product type. If the fix for your specific attic calls for mineral wool but the contractor only installs fiberglass, you’ll get fiberglass. Insulation problems have multiple correct solutions; the right one depends on your home’s specific conditions, and Warm House Insulation Co home carries product breadth specifically because Stanton attics vary so widely.
When to Call a Professional
Some attic insulation maintenance tasks are appropriate for a careful homeowner with gloves, a headlamp, and a dust mask. Others are not. Call a professional when: your compression check shows more than 20 percent depth loss across multiple measurements; you find active rodent infestation or extensive droppings that require insulation removal and entry-point sealing; you see mold growth on insulation or the roof deck that extends beyond a small isolated patch; you discover your bathroom exhaust fans or dryer vents are discharging into the attic instead of through the roof; or you’ve attempted ventilation improvements but your attic still bakes in summer. These conditions indicate systemic problems that need diagnostic work, not a quick product addition. Warm House Insulation Co offers free thermal assessments and estimates for insulation work in Stanton – call (866) 361-3775 to get started.
Frequently Asked Questions
Twice a year – once in late spring before summer cooling season, and once in late fall after the first Santa Ana wind events. Stanton’s hot attic summers cause thermal stress from June through September, and the windy fall months introduce dust and rodent pressure that materializes in winter. A twice-yearly cadence catches both stress cycles early.
Measure the current insulation depth in at least five locations and compare your lowest reading to the original installed depth. If blown-in fiberglass or cellulose measures more than 20 percent below its original depth in most spots, it’s functionally compressed. A 15-year-old attic in Stanton commonly shows 25 to 35 percent depth loss, which translates directly to reduced thermal performance and higher cooling bills.
Generally yes, as long as the old material is dry, uncontaminated, and free of rodent activity. Adding loose-fill insulation on top of existing loose-fill is standard practice when the base layer is still viable. Never top-dress over wet insulation, moldy material, or sections with heavy rodent contamination; those areas need removal and replacement first. Call (866) 361-3775 for an exact assessment of your specific attic.
Rockwool mineral wool carries natural density and material properties that make it far less attractive to roof rats and squirrels than loose-fill fiberglass or cellulose. Rodents prefer soft, fluffy materials they can tunnel through easily. Dense mineral wool batts resist that tunneling behavior. Pairing mineral wool with entry-point sealing addresses both the material problem and the access problem.
Blown-in cellulose in a Stanton attic typically remains effective for 20 to 25 years under good conditions, but its practical lifespan depends heavily on moisture exposure and settling. In our experience, cellulose performs well for the first 10 to 15 years, then begins to show measurable settlement that justifies a top-up. If the attic has a history of moisture or pest intrusion, the effective lifespan can shorten to under 10 years.
Yes, because the maintenance itself prevents the expensive failure. A Stanton homeowner who checks compression and ventilation twice a year and addresses problems early will spend a few hundred dollars on top-ups rather than several thousand on full replacement after years of accumulated damage. The annual time investment is under two hours per year.
The Bottom Line
Attic insulation in Stanton is a system that degrades on a schedule set by your home’s specific conditions: how hot the attic gets, how well it ventilates, what wildlife lives in the neighborhood, and whether anyone has disturbed the material over the years. A 15-year-old insulation layer that looks fine from the hatch is often performing at a fraction of its original rating. The maintenance sequence – measure depth, look for rodent sign, check ventilation, inspect for moisture, document everything with photos – catches problems at the point where repair is cheap and straightforward. Run the checks in spring and fall. Address what you find. For more guides & resources, visit our blog. Call (866) 361-3775 for a free estimate on any attic insulation improvement in Stanton.
Written by the team at Warm House Insulation Co, serving Stanton since 2011.